Client Project : A Tuxedo Kitchen (+A Video!)
 It’s time for another client kitchen reveal, and I think you guys are going to love this one! I’ve been best friends with the homeowners for as long as I can remember. We actually went to elementary, high school, and college together in Indiana. Now we’re both located in Utah with our spouses and I jumped at the opportunity to help two of my very best friends transform their kitchen. Click through for all the details, resources, backstory, plus a video of the process!
 Allow me to introduce my amazing bfs Dru & Brooke. They’ve been updating their home in Salt Lake City room-by-room. When Brooke asked me to design their kitchen, I was excited to jump in and make their dream kitchen reality. Aside from being best friends, this wasn’t the ordinary client kitchen project. The couple knew they wanted to use IKEA cabinetry and wanted to stick to a $15,000 budget. That budget included everything… brand new appliances, cabinetry, paint, plumbing fixtures, labor, and even the decor. I had honestly never worked with IKEA cabinetry until this project, and I wasn’t quite sure what to expect.
 My goal was to meet all of the items on their wishlist, as well as create a space that looked like they paid much more than their $15k budget. Even if you don’t have a huge amount to spend, it’s important to curate materials that look and feel cohesive- with varying price tags. Their must-haves included:
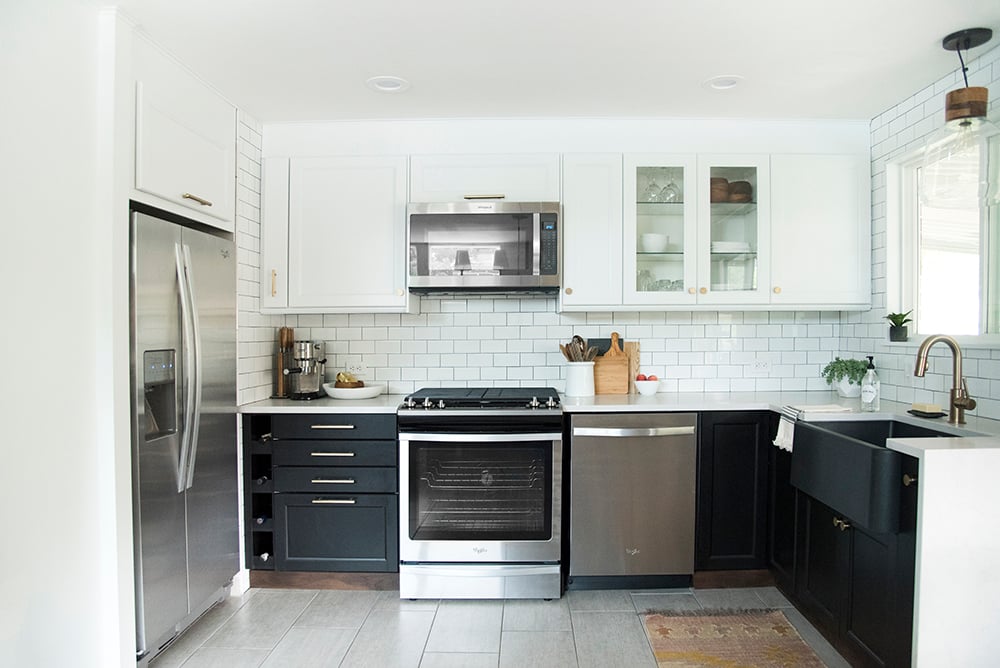
- Black or white cabinetry (I opted to give them both)
- A modern, durable countertop
- New plumbing fixtures (sink and faucet)
- New appliances (refrigerator, dishwasher, range, and microwave)
- A new kitchen window
- Window treatments for the sliding glass doors
- New light fixtures + recessed lighting and cabinetry lighting
- A subway tile backsplash
- New cabinetry hardware
- Better use of storage / layout
- A functional dining area including furniture & decor
Check out what their kitchen looked liked before we started. This was even after they tiled the floor- there used to be BLUE carpet. Yep- carpet in the kitchen. Just imagine that visual.
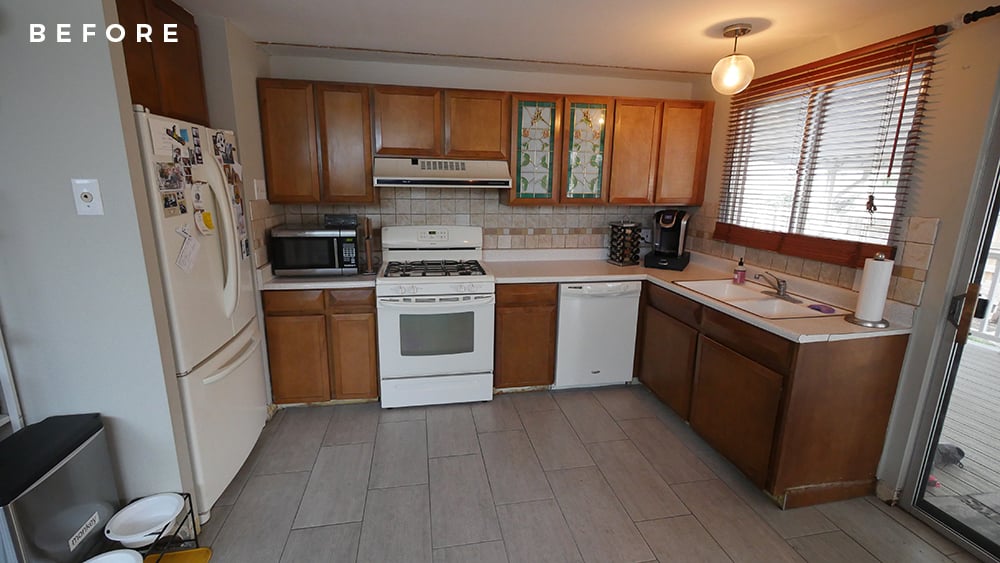 That sounds like a tall order, right? It was definitely a “demo everything” sort of situation. The only thing they kept was the floor tile and the sliding doors. There were certainly challenges with this project, but I think the end result turned out really great. Check out the video for a glimpse into the process…
Here’s what my initial renderings looked like- although IKEA’s kitchen planning software isn’t top notch, so it’s not entirely accurate.
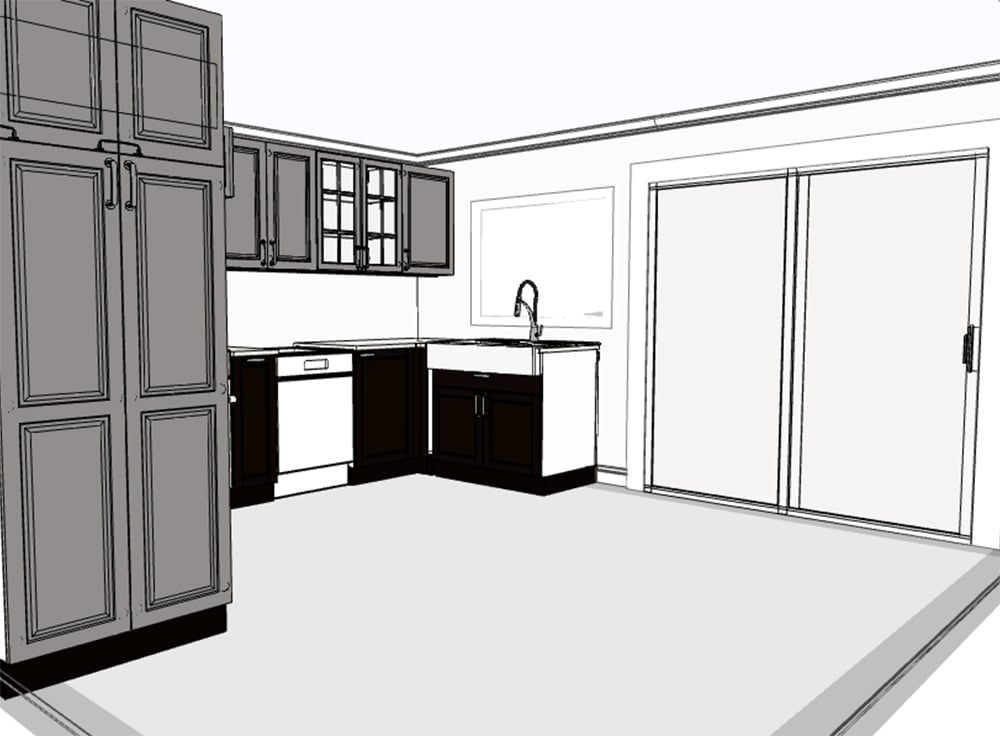
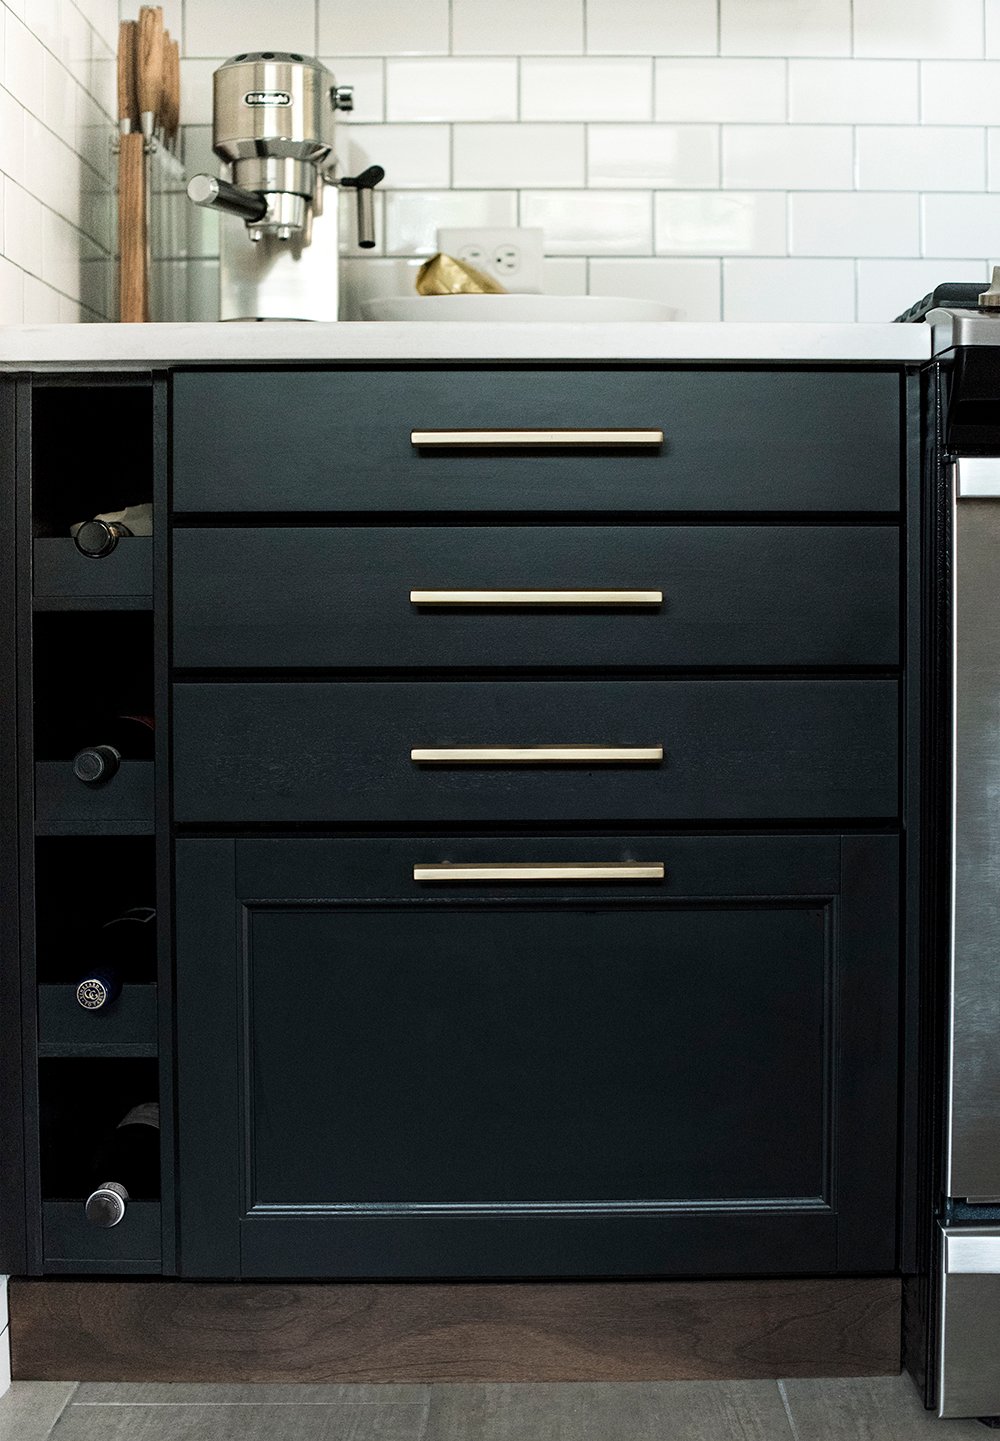
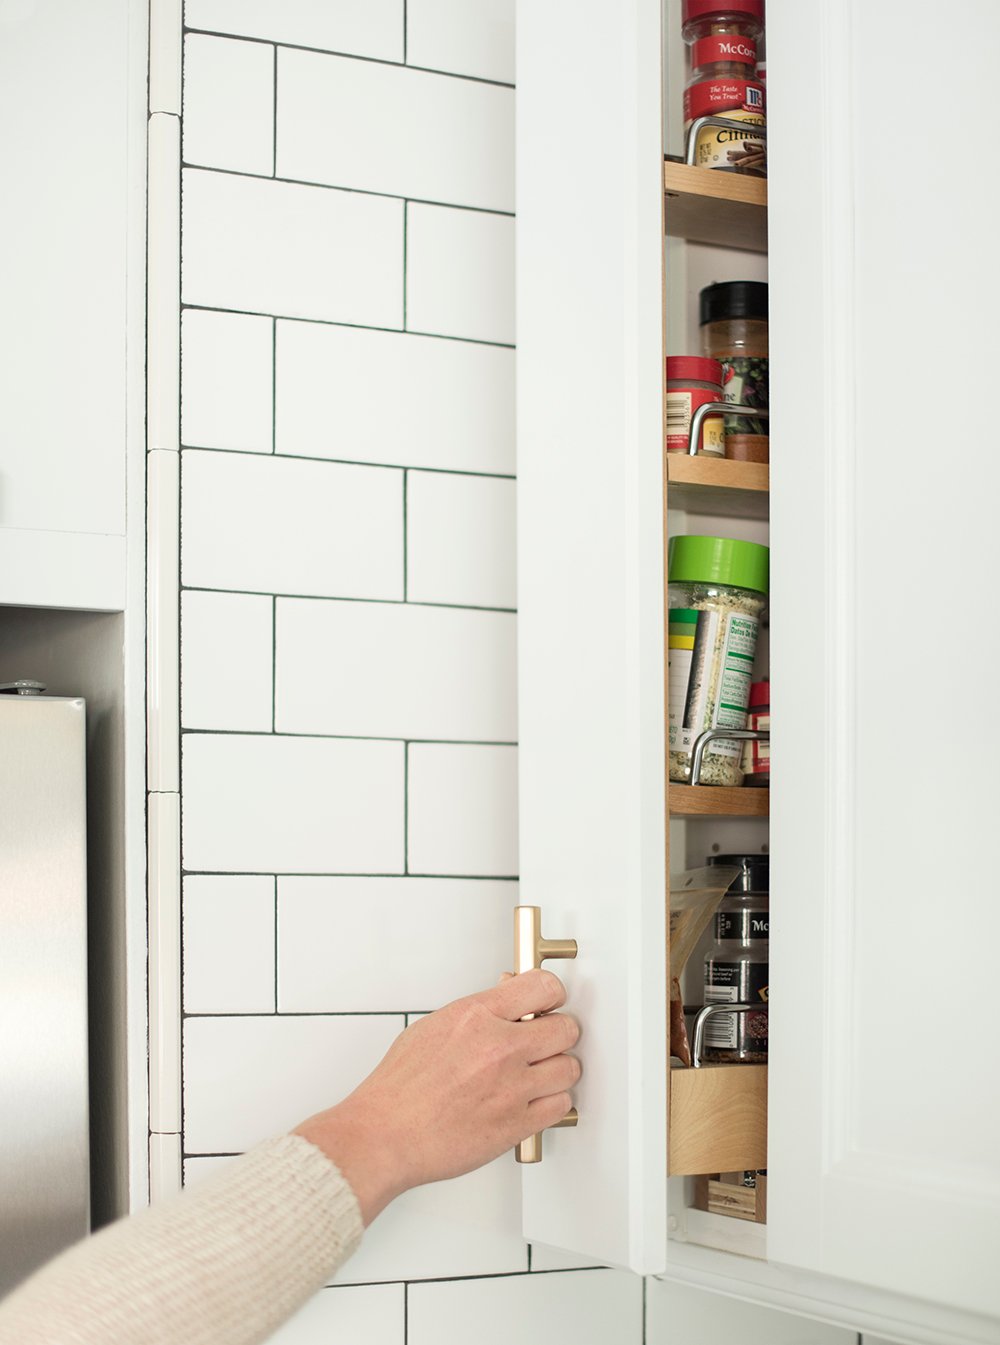
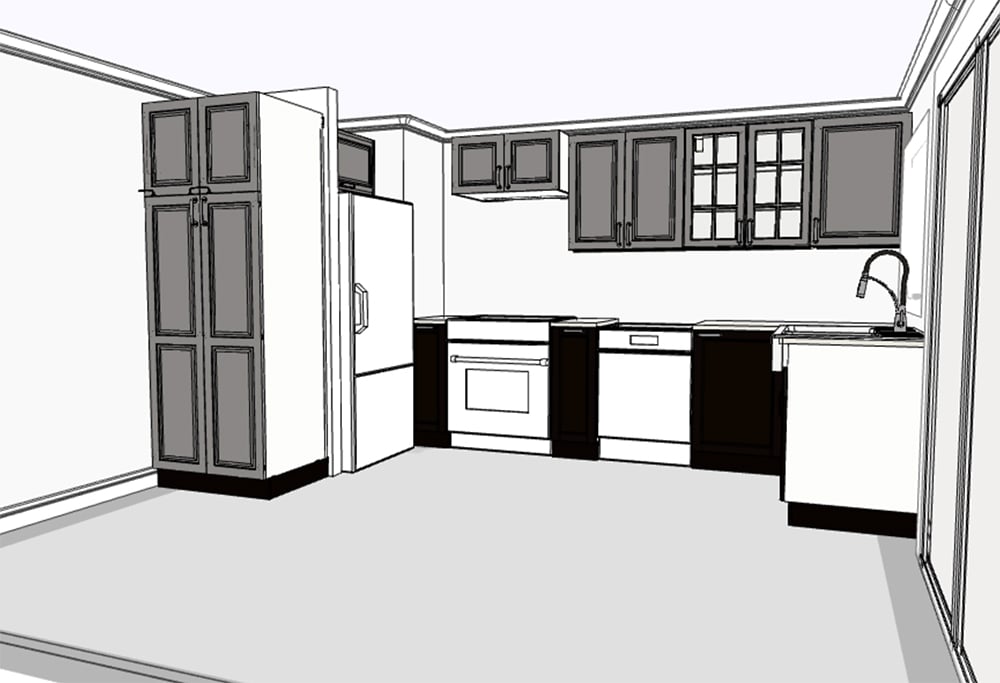 Although the cabinets are IKEA, I really tried to have them altered like I would a completely custom kitchen. Before, the kitchen was not super functional in terms of storage or layout. The corner was wasted and some of the ‘drawers’ were dummy drawers. I created a more practical layout that took advantage of the corner space with a lazy susan, and added custom features like wine storage, a pull-out spice rack, and a cookie sheet cabinet… in addition to maximizing the overall storage. We even added a pantry that is large enough to hide the trash cans!
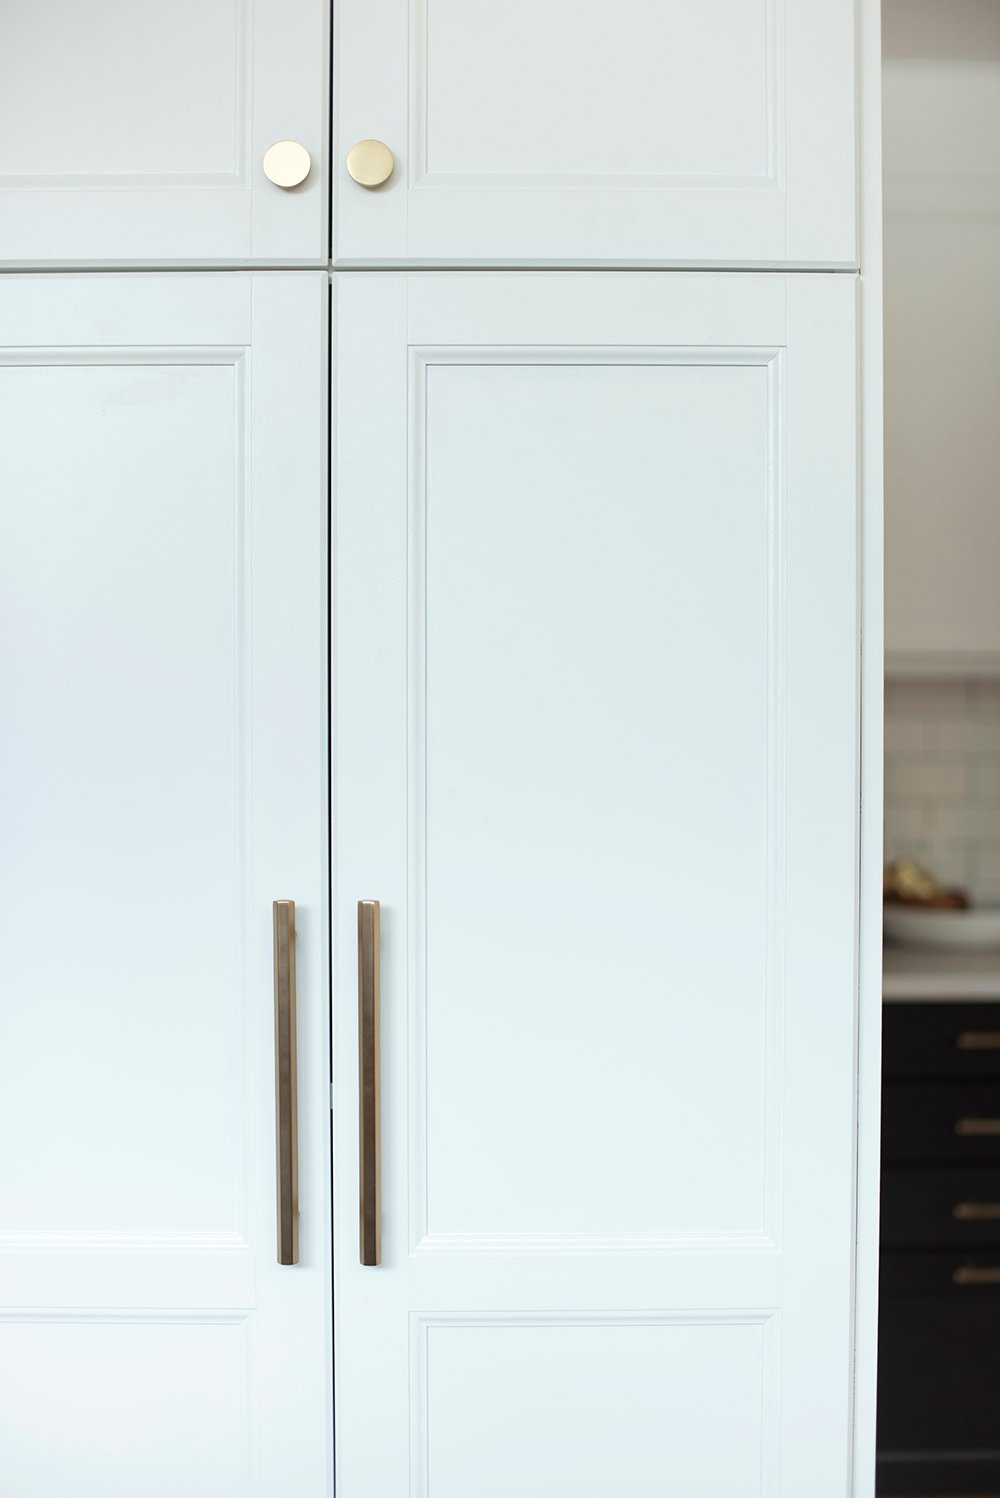 This was actually quite a challenge because the IKEA ‘standard’ size is not the norm. The contractors had to cut and modify the cabinetry to fit normal plumbing fixtures and appliances – like the amazing apron front sink and the stainless steel appliances. Even after modifying, there were only so many floor plans that would work in this space. The other issue we ran into with the cabinetry was the color. I really had my heart set on a tuxedo kitchen for Dru & Brooke and during our design meeting, that was the option they fell in love with. It turns out shortly after our meeting, IKEA discontinued the true white cabinets we had sourced. They were only available in a creamy off-white tone, which we definitely didn’t want. After much debate, we ended up ordering black cabinets for the uppers and lowers, and the couple ended up painting the uppers themselves. I think the end result was well worth it, and as opposed to having them professionally painted- we saved a ton of room in their budget.
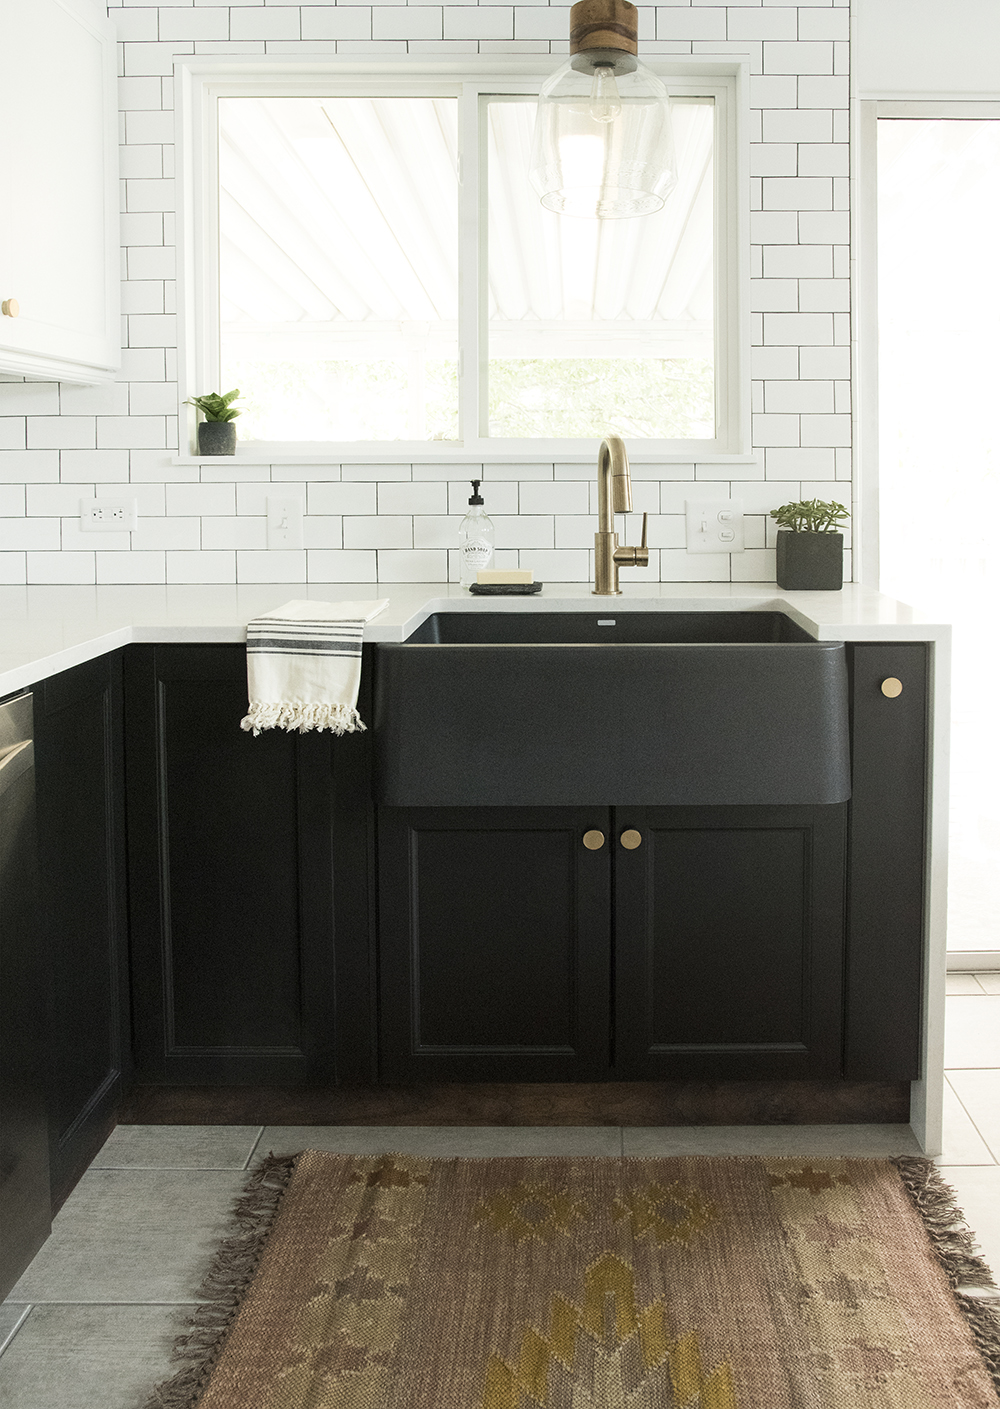
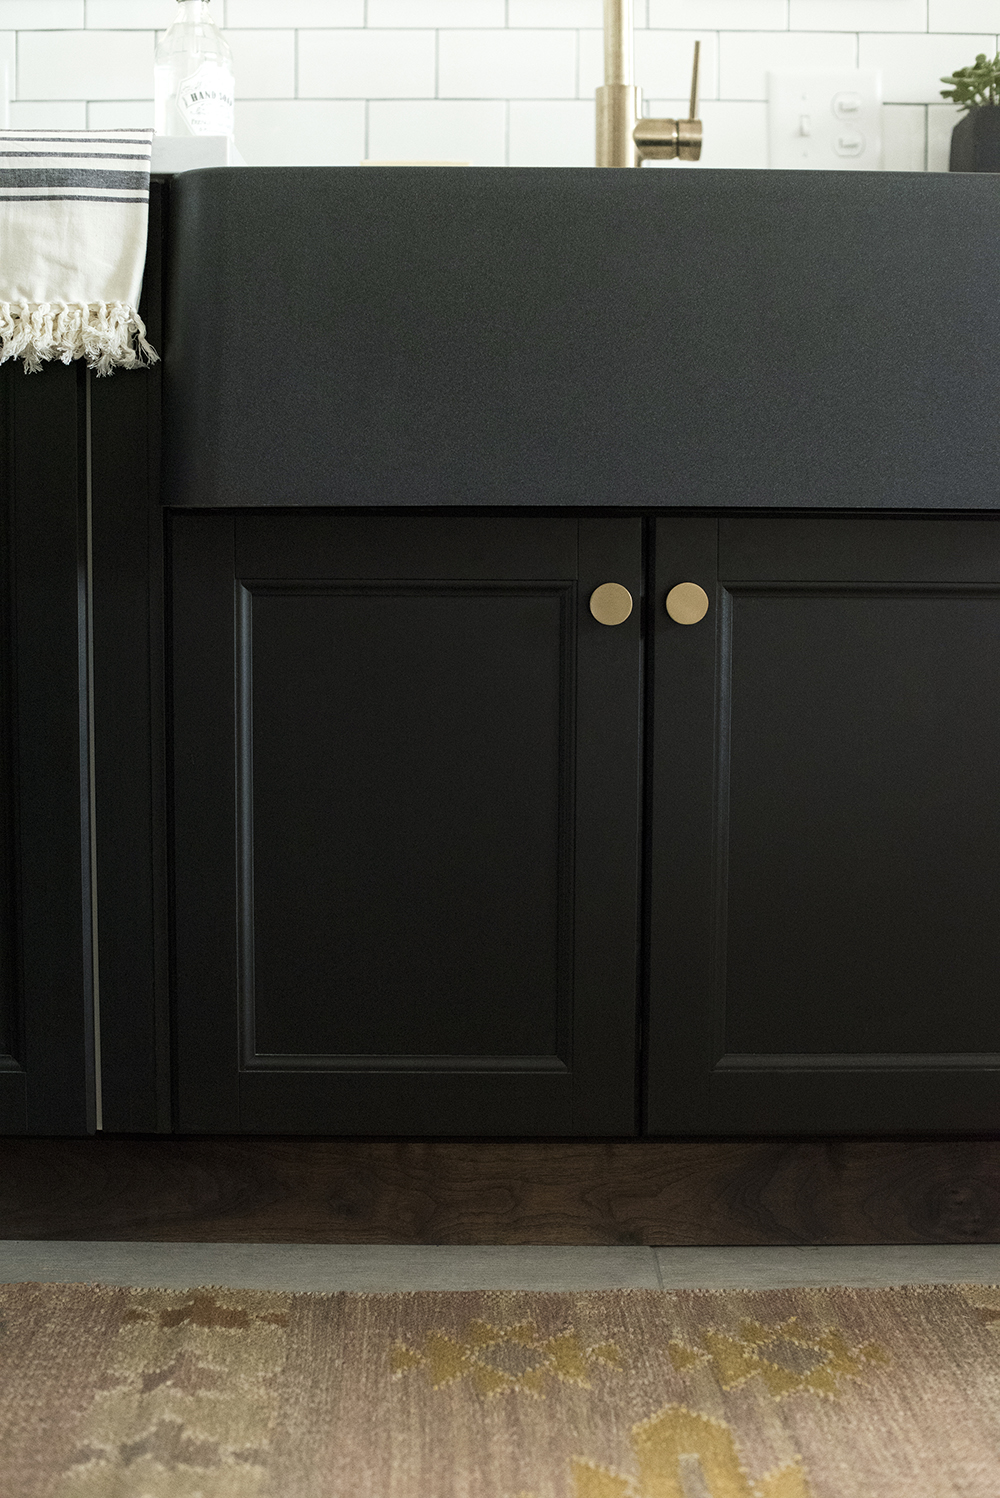
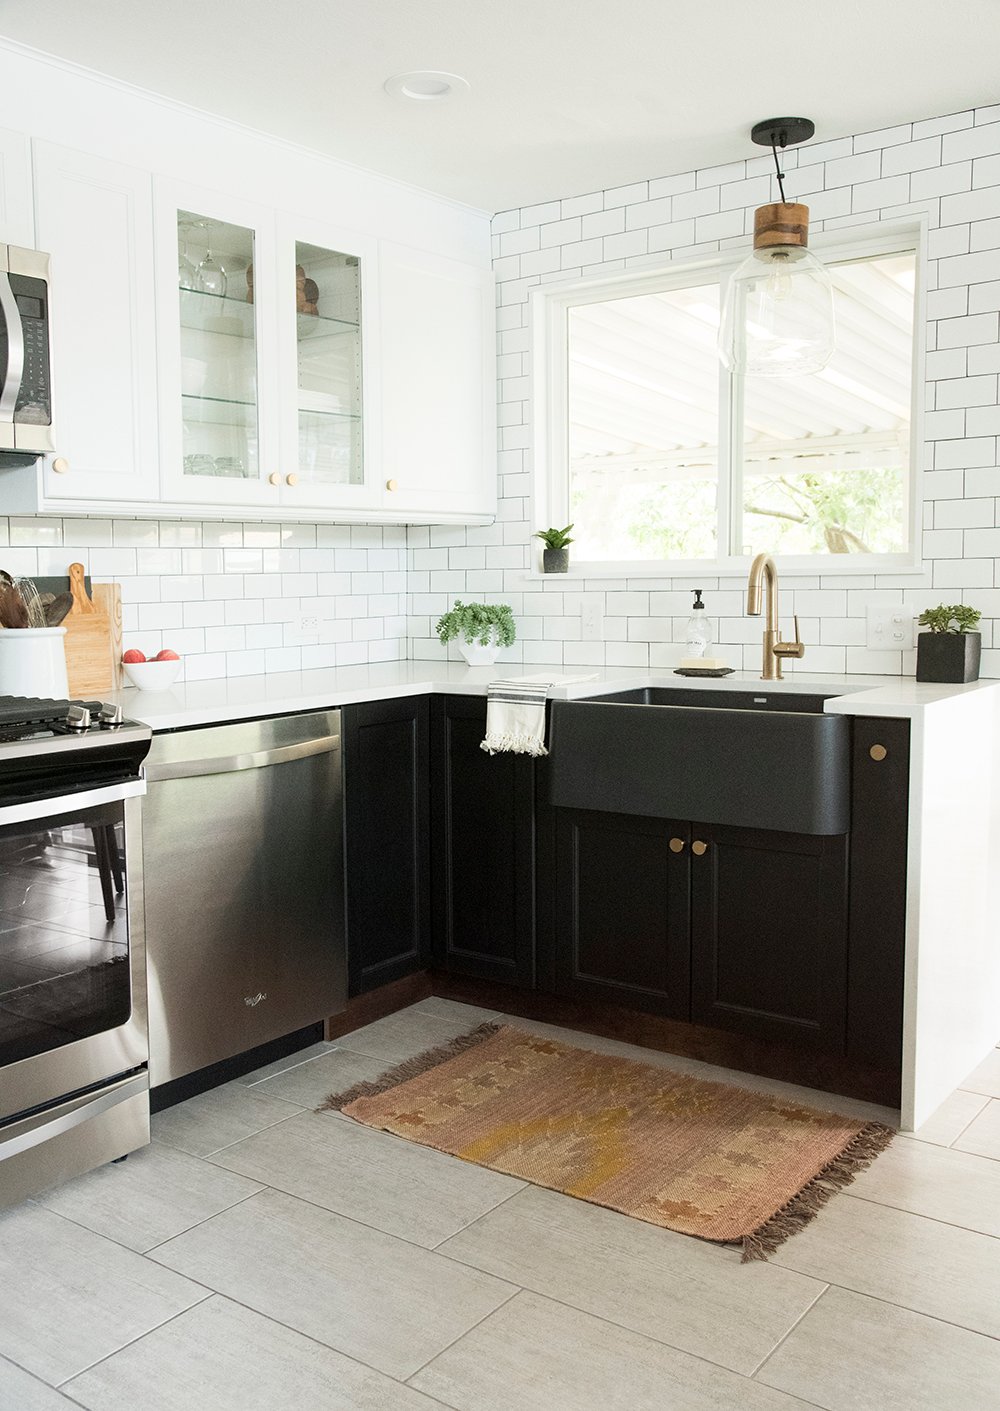
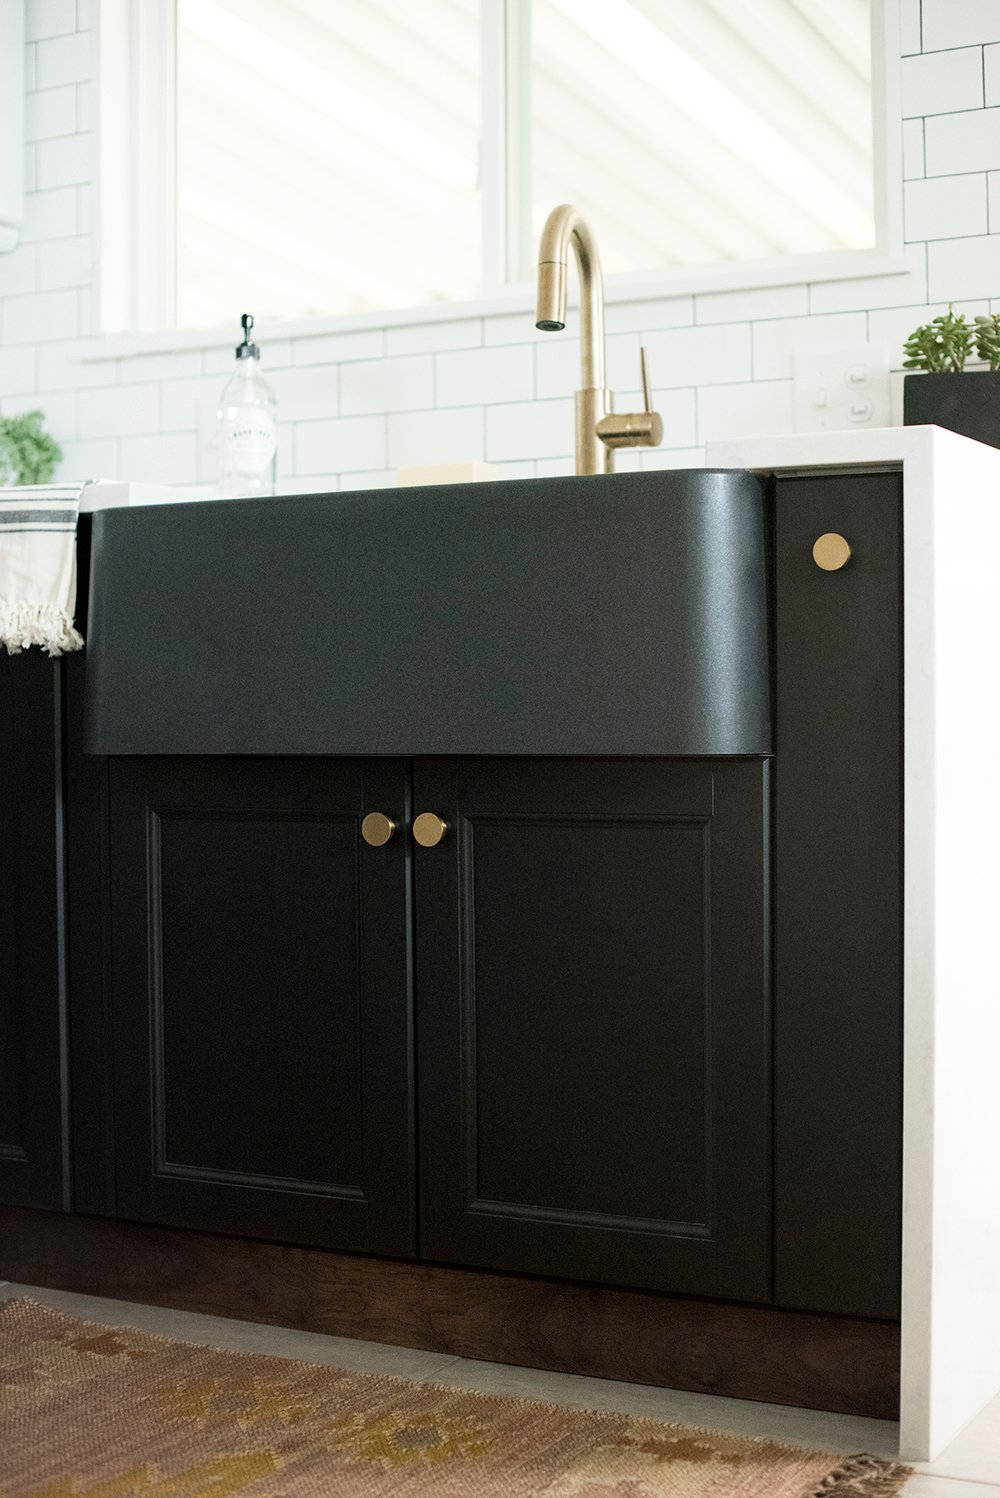 IKEA cabinets also come with a really inexpensive, plastic finishing piece for the lower units… it definitely made the cabinets look cheap. I envisioned a custom wood toe kick to add some warmth to the space and tie in the pendant light above the sink.
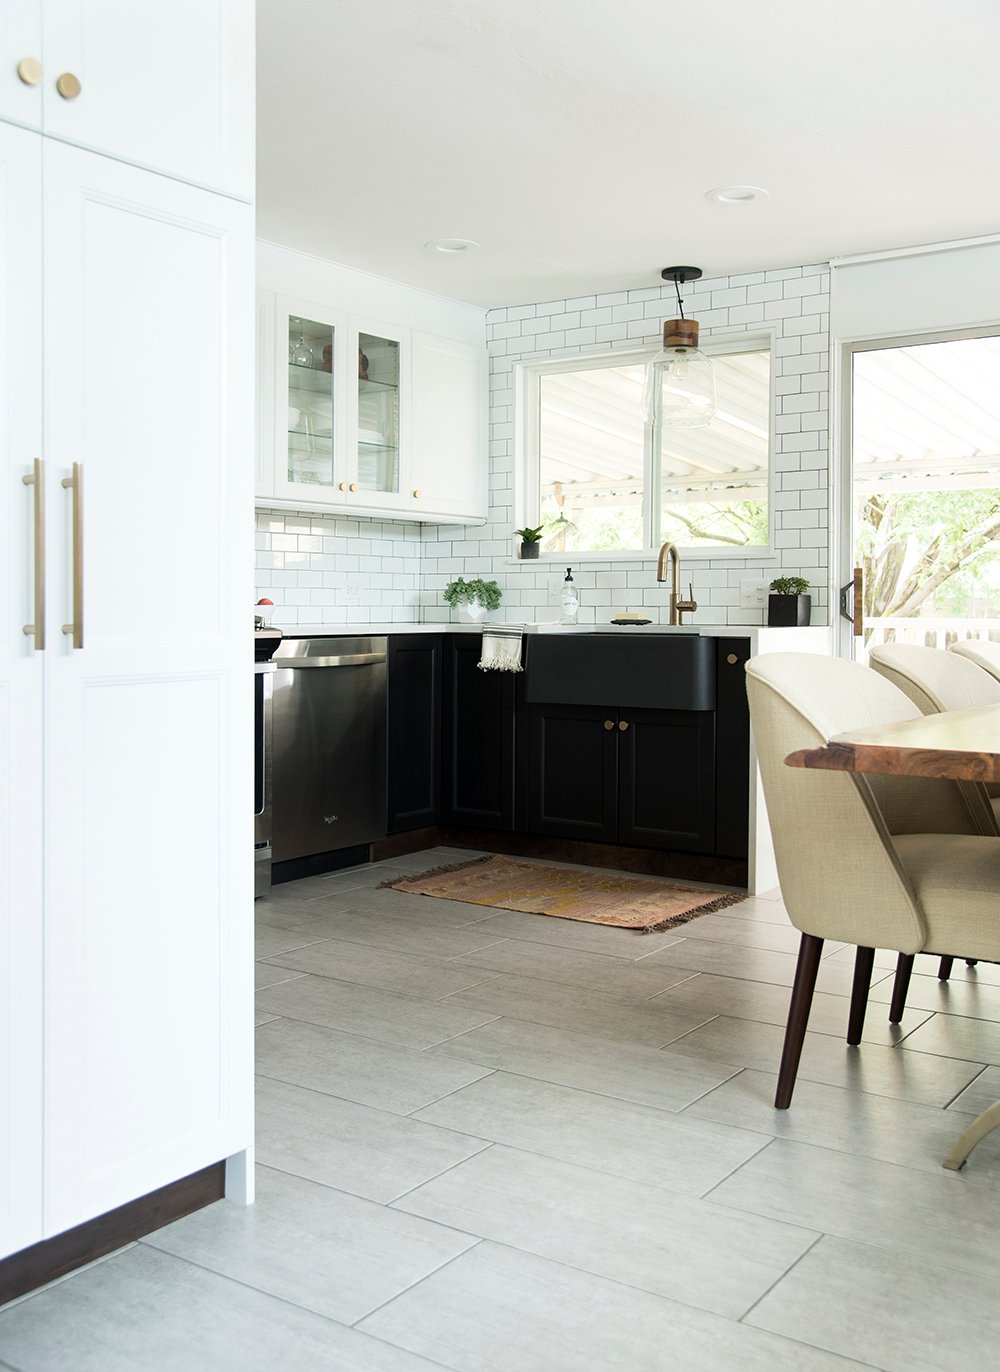
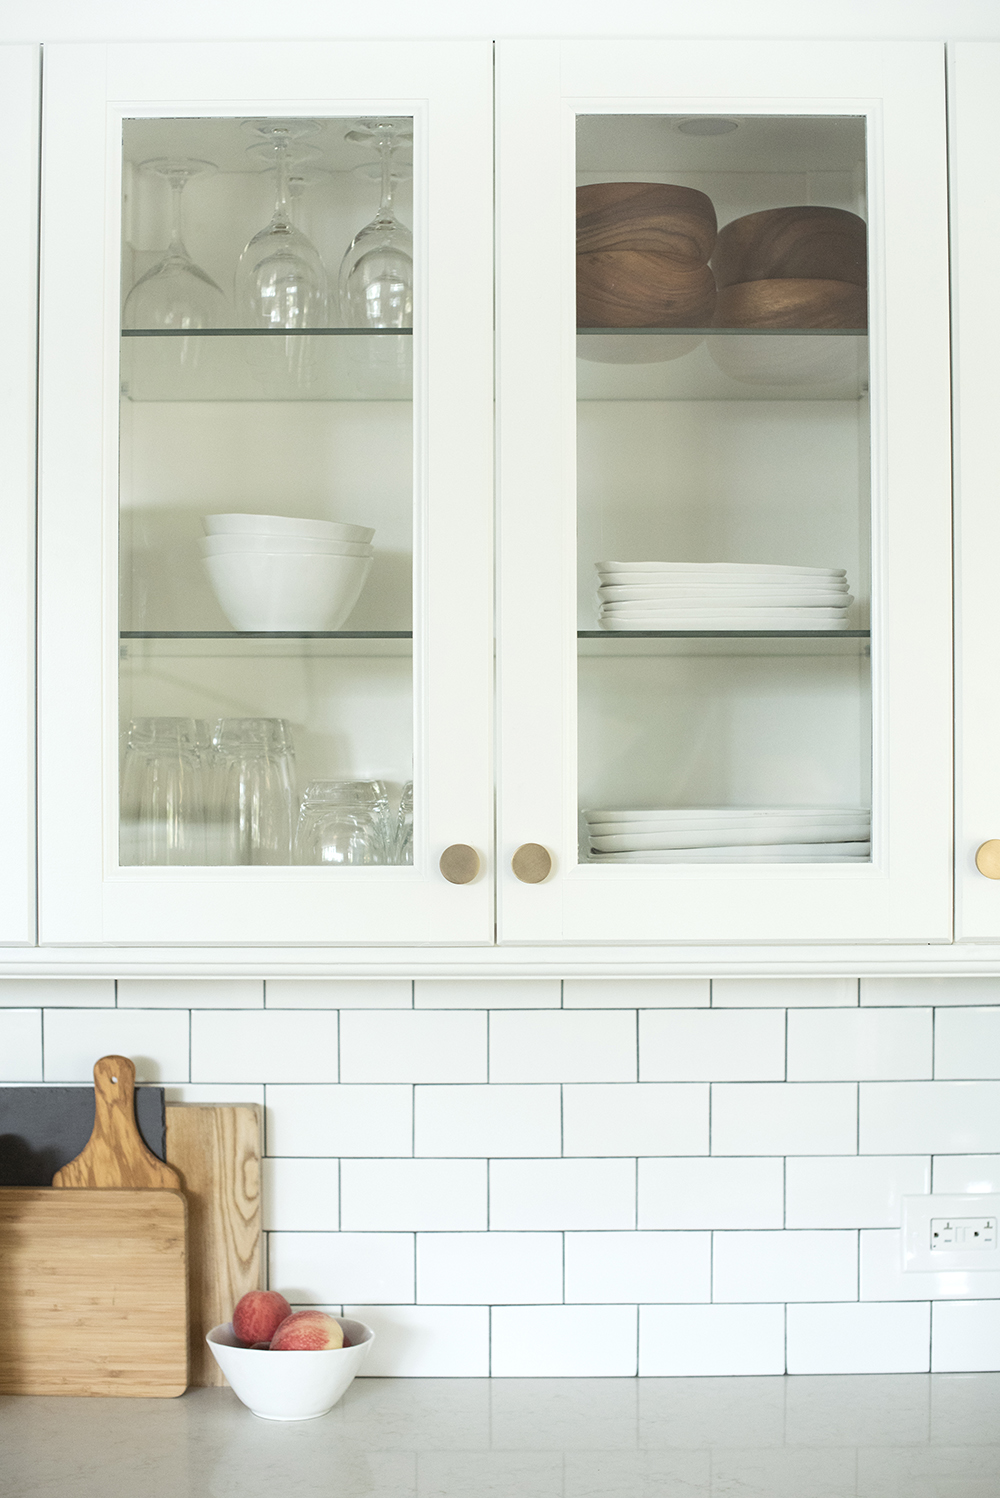
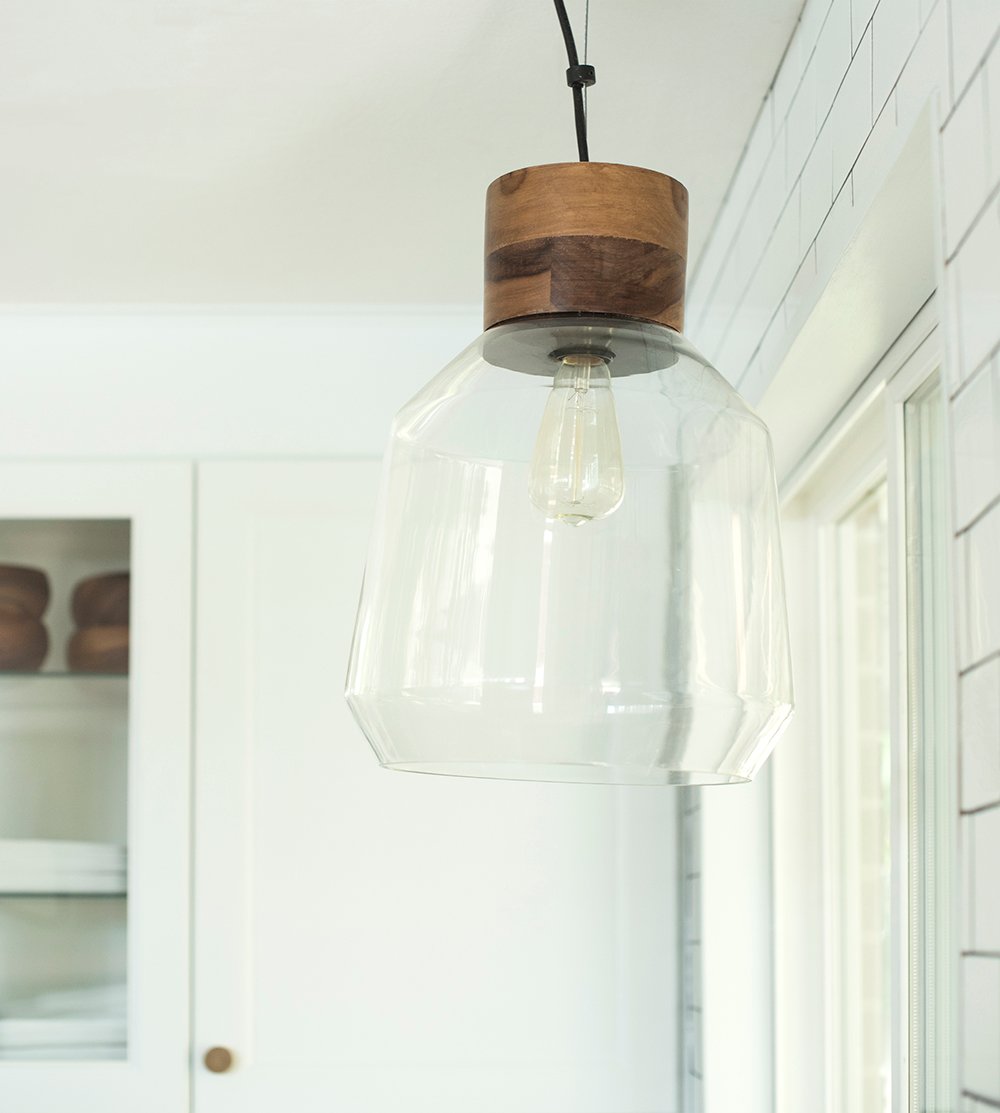 Speaking of lighting, I reworked Dru & Brooke’s entire lighting plan. The existing lights weren’t centered or positioned correctly for their updated kitchen layout, so we added some recessed can lights and shifted things around. In addition to overhead lighting, Dru asked for cabinetry lighting… so we did that as well. The clear glass uppers are lit from the interior, and all of the upper cabinetry has lighting installed beneath it.
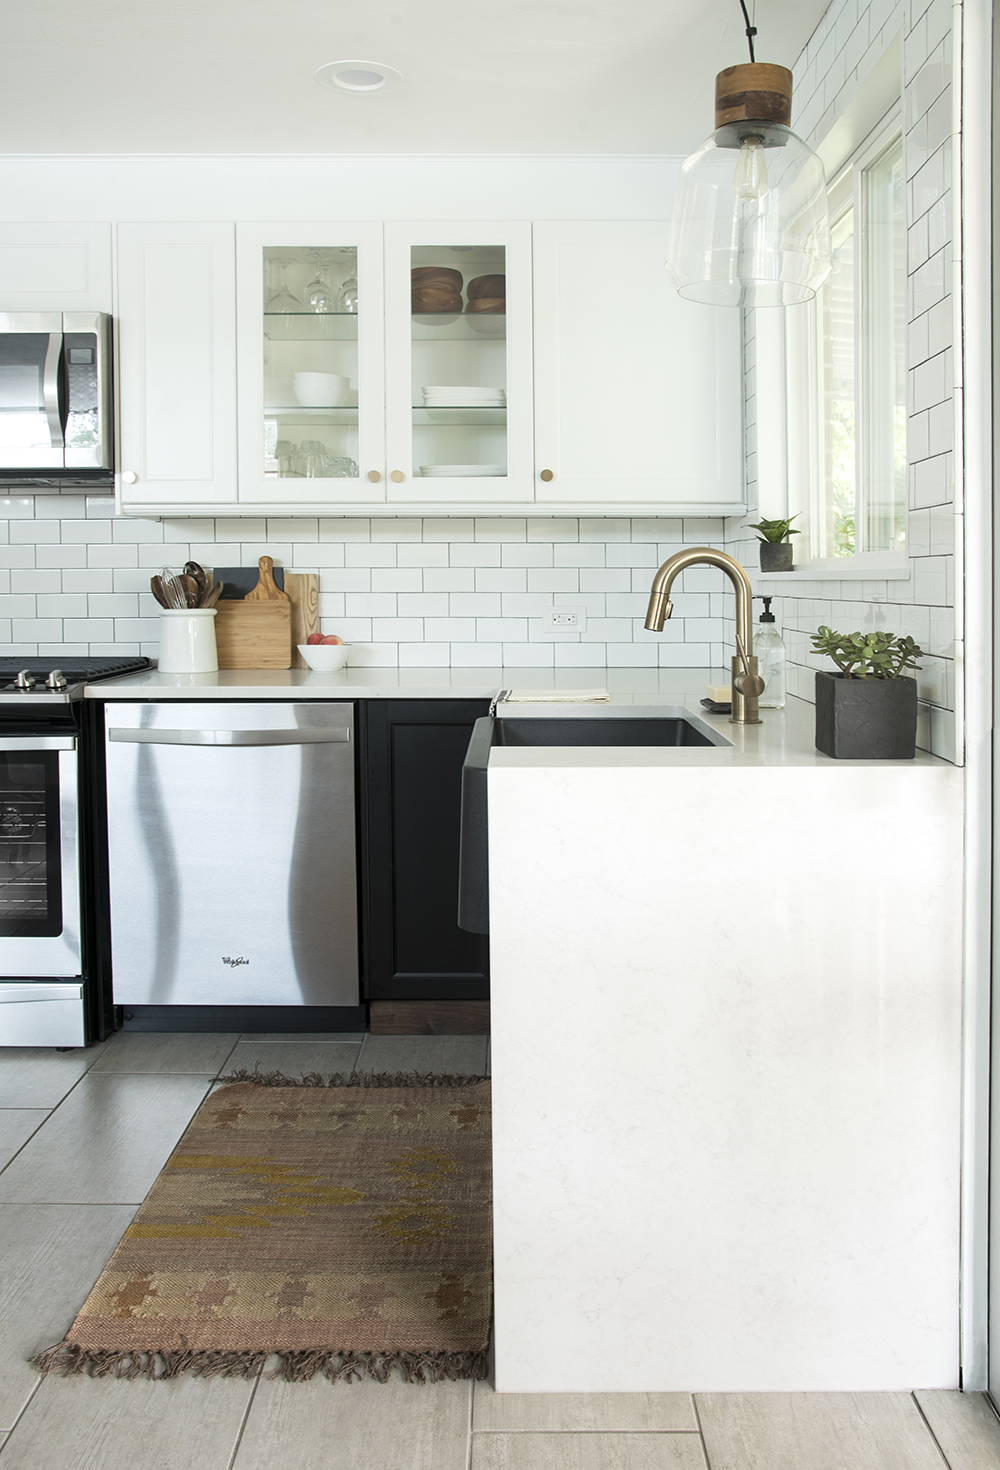
 Obviously, the star of this kitchen is the countertop with that gorgeous waterfall edge! Cobble Creek Countertops did a great with the installation. It’s absolutely perfect! Quartz was the obvious choice for the material… it fit the bill for their “modern and durable” request. We used Caesarstone’s London Grey and photos just don’t do it justice. You can really see more of the veining in person. The waterfall edge was not only something I envisioned from an aesthetic perspective, but also a solution to a problem. Roxy, their adorable rescue pup goes in and out of the sliding glass doors multiple times a day. Their old cabinetry was banged up and getting destroyed in that area because of the excessive use and exposure to the elements (dirt, excessive sun, rain, snow, water, etc). The waterfall edge is so much easier to clean and will virtually last forever- unlike cabinetry.

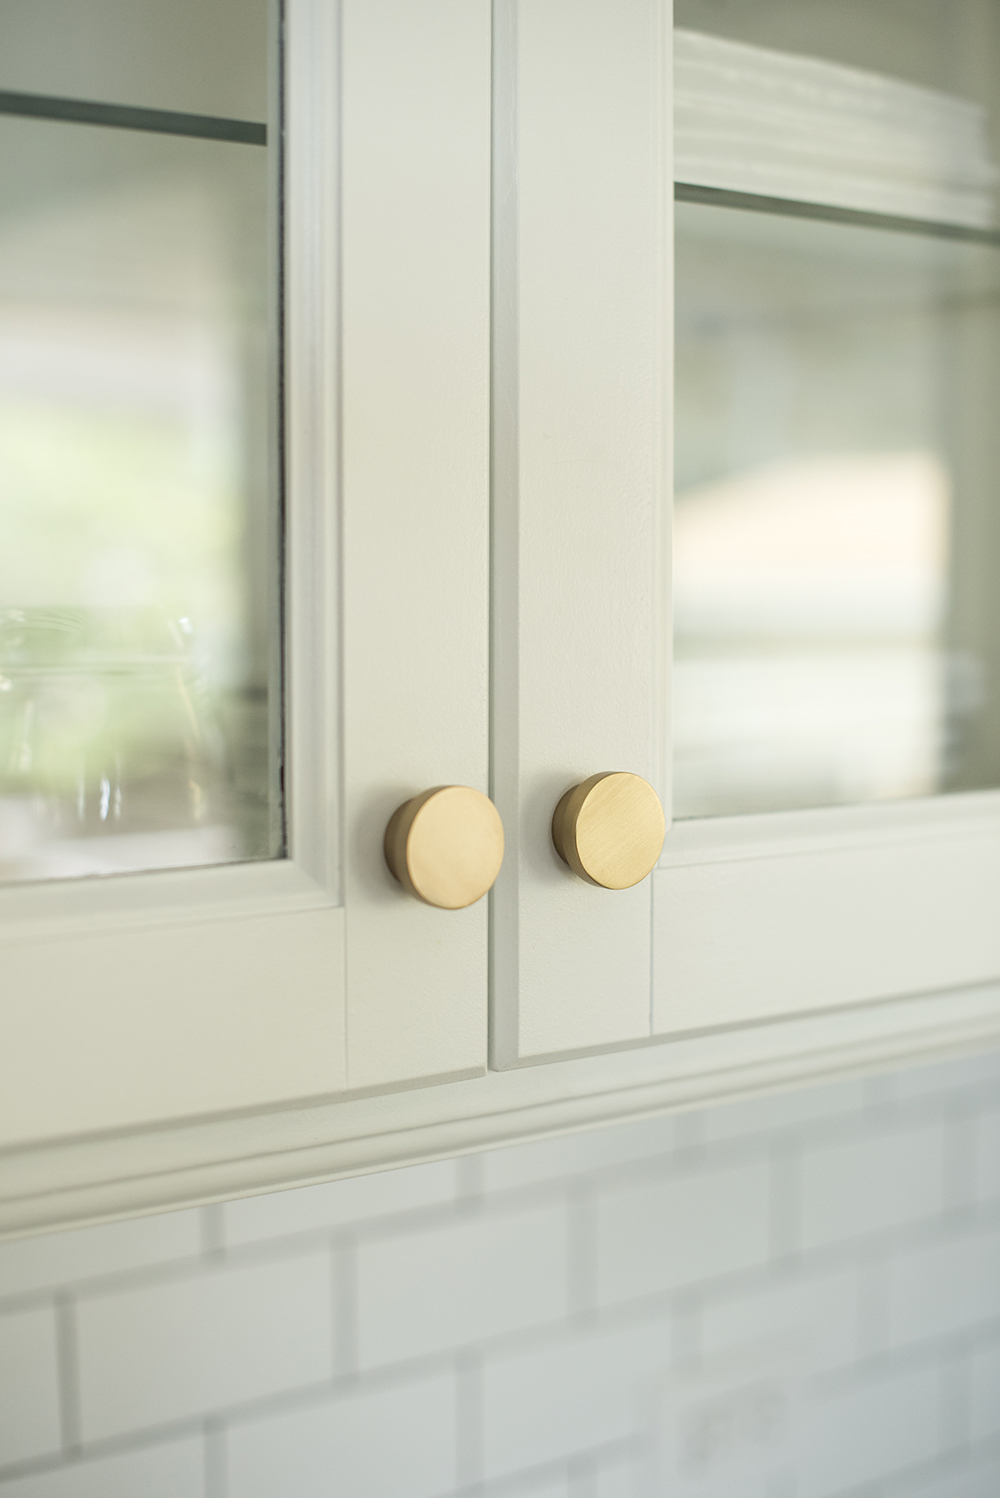
 I also have to take a minute to talk about the gorgeous hardware! Brooke and Dru knew they wanted stainless appliances. They already had them selected and were 100% committed. However, when Brooke would talk to me about the color palette she envisioned (which was ironically their exact wedding colors – black, white and gold), she wasn’t sure how I would implement the gold, or in this case- brass. Mixing metals is a-ok. In fact, it’s better than ok! I actually prefer mixing metals and don’t love a ‘matchy matchy’ look. Just because you have stainless appliances, doesn’t mean you can’t mix in brass or another metal. In the end, one of Dru & Brooke’s favorite things ended up being the hardware and I’m so glad I was able to convey my vision and incorporate the brass she had initially imagined, even though it was originally a bit out of their comfort zone.
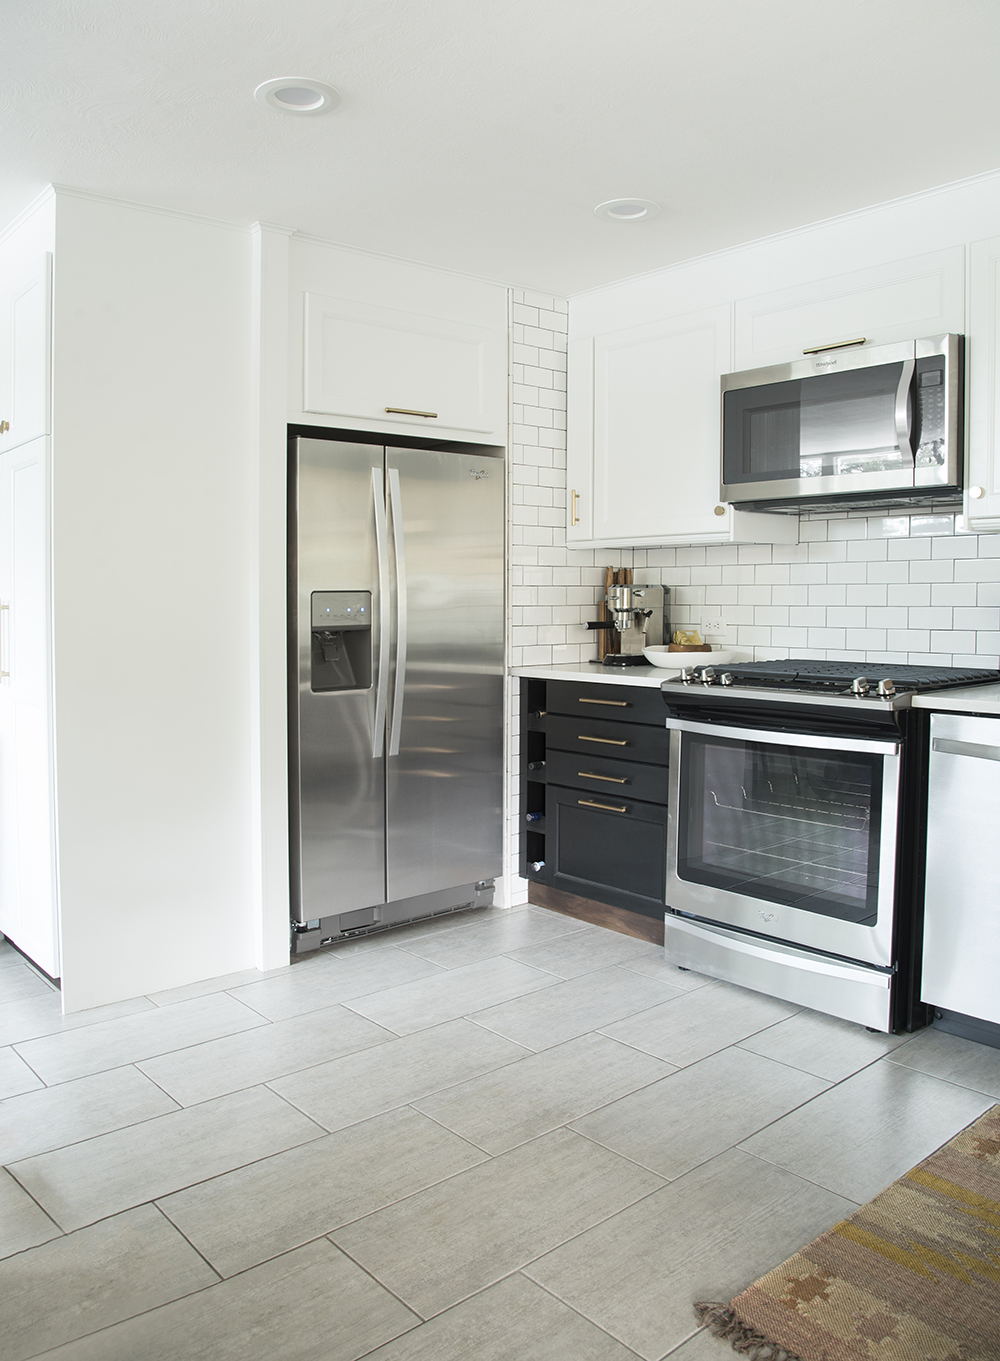
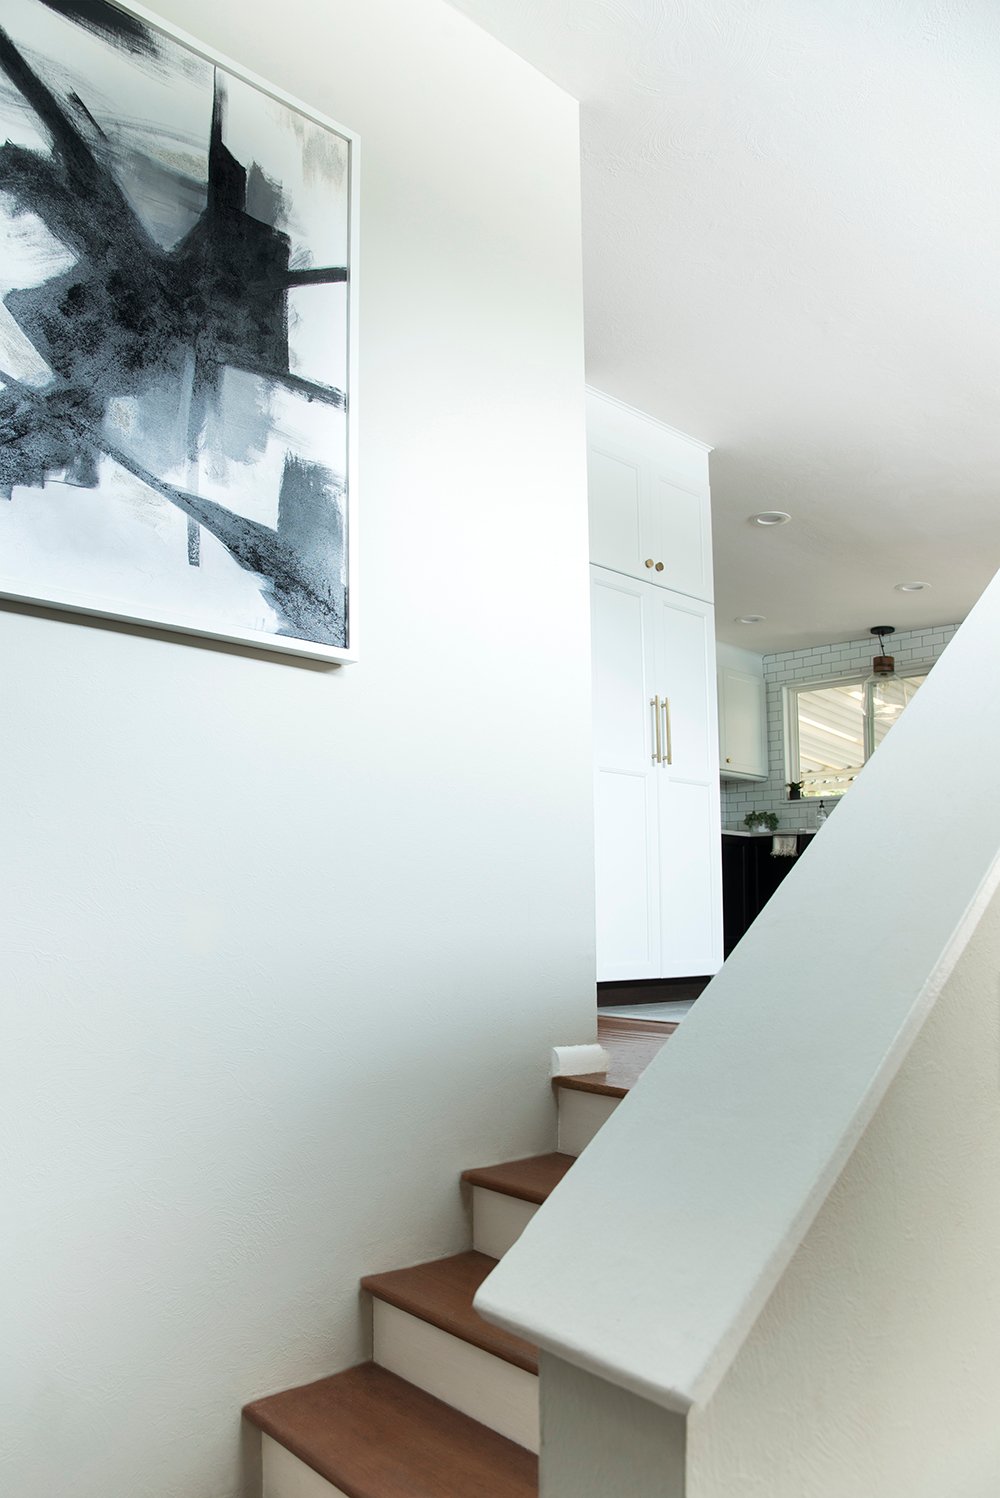
 This wide shot will help give you some perspective and put the kitchen into context. They live in a tri-level home and this space is really the heart of the house. You can see it from the entryway, the living room, the hallway, the bedroom, and even from the exterior deck. That’s another reason their preferred neutral color palette looks so well. It blends seamlessly with the rest of their home and decor.
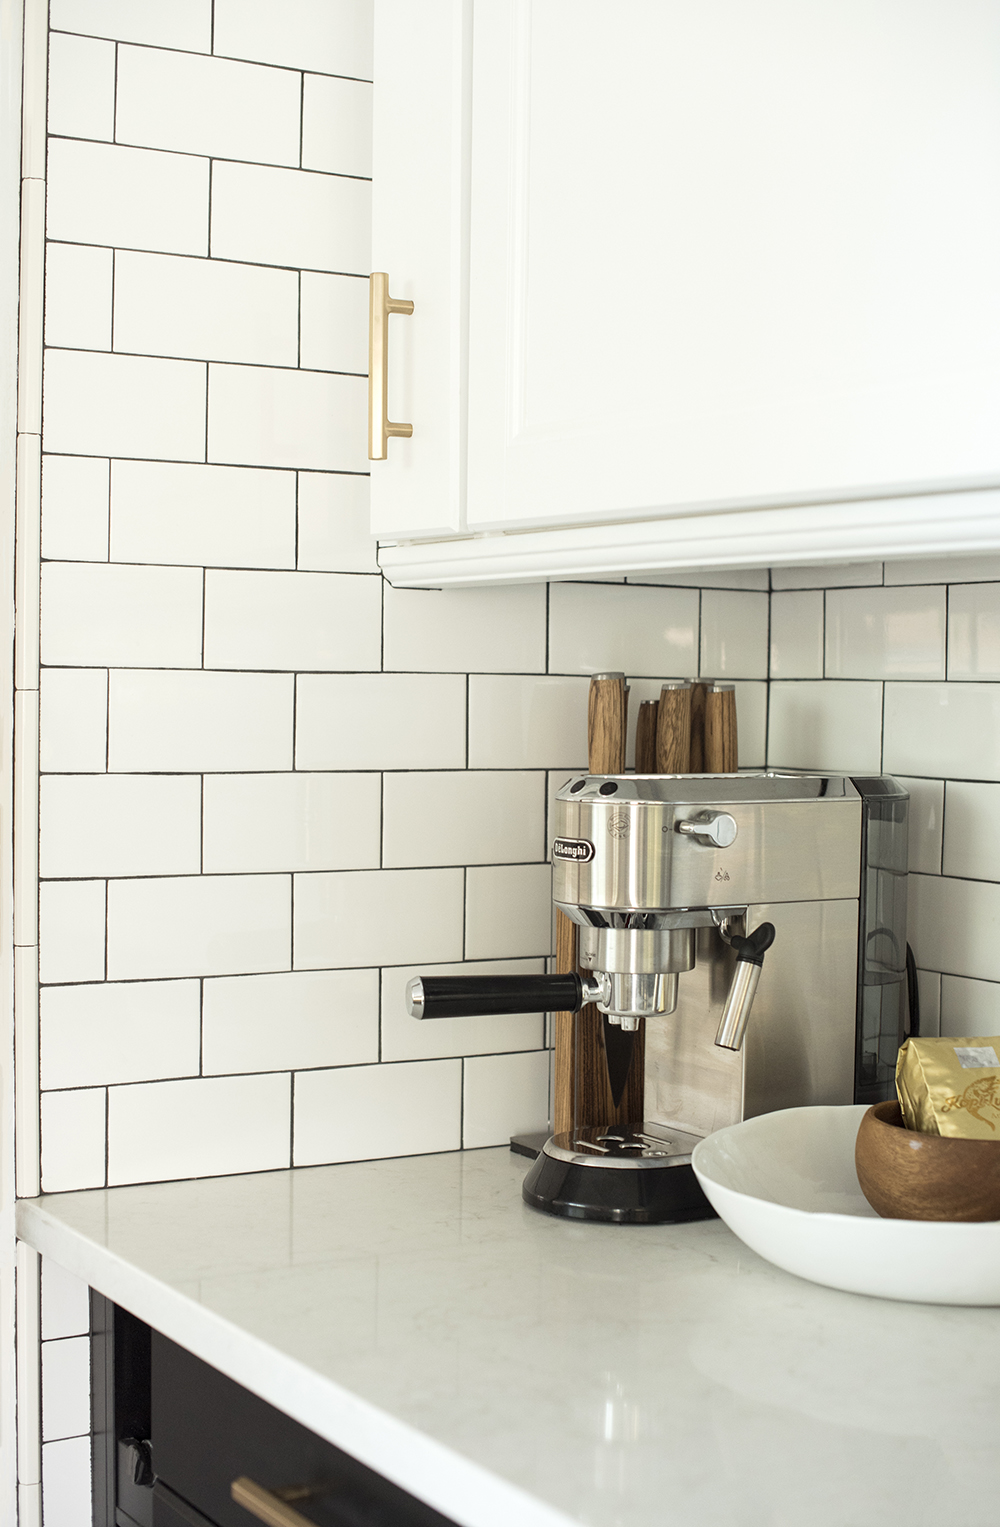
 Lastly, I’ll touch on the backsplash. They already had their hearts set on subway tile before I even entered the equation. We opted for a traditional running bond pattern with a high contrast black grout. I also designed the backsplash to go from floor to ceiling. It’s much easier to clean and worked well with their existing architecture. Their home doesn’t have beefy or bulky trim and they don’t plan to add any for awhile, so running the tile all the way to the ceiling created a more finished look.
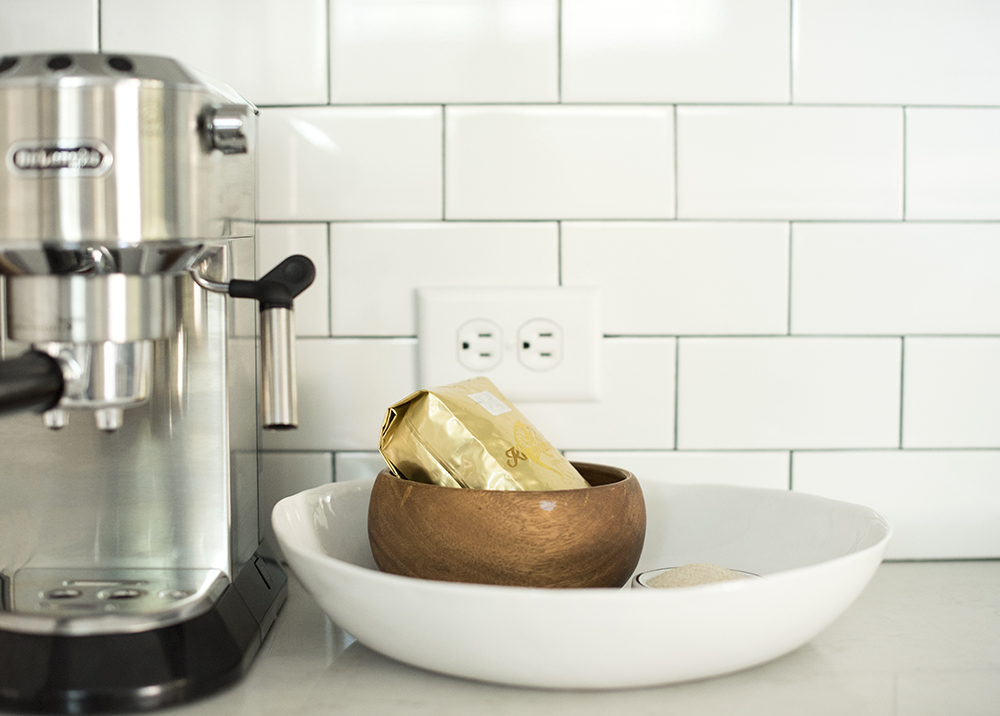
I always instruct the electrician to position the outlets horizontally when installing a traditional backsplash of this nature. It helps to camouflage the backplates with the tile.
 Since this post is already realllllly long, I’ll be sharing a separate post this evening that includes ALL of the resources and product links. What do you guys think?! Do you love it? Would you change anything? Can you believe we did this project on a 15k budget? I’m happy that Dru and Brooke love their new kitchen and are enjoying cooking- as well as entertaining.
*This post is brought to you in collaboration with Caeserstone, as they generously provided us a quartz slab. All content, ideas, and words are my own. Thank you for supporting the sponsors that allow us to create unique content while featuring products we truly use and enjoy! I also have to thank Dru (yes, the homeowner from this post, Dru) and 43 Productions for the wonderful video.